Monday, July 29, 2013

Gone to the Dogs

So...

I started this blog about a year ago and for the first six months I was completing about one project (and one post) per month. Then I adopted a puppy.


Murphy was three months old when my husband and I picked him up from our local SPCA and he has kept us both VERY busy. Puppies are work, y'all!

Anyway, between house training, obedience school, walks at the lake, and snuggles, I didn't really have time for projects. I was also serving as the Matron-of-Honor (how old does than sound?) for my best friend. But my little pup is growing up, my bestie is a married woman, and I'm on summer vacation, so the projects have resumed!

I'm juggling a bunch of different projects for now, but here's one that's done:


Murphy's Corner

A quick tour:

I built the shelf myself using a single piece of wood. I cut it in half with a handsaw and attached the two pieces together using L-brackets. I painted it with some a light grey I had sitting around (I compulsively buy "oops" paint and pre-mixed samples, so I always have plenty on hand). I bought four double robe hooks and attached them to the backboard. All told, this project cost less than $15 and took about 30 minutes to complete (not counting the time it took for the paint to dry).

On the shelf is a dish I picked up at the flea market where we keep some keys, the certificate Murphy and I earned for completing obedience school, a mason jar for flowers from our yard (currently Crepe Myrtle blossoms) with a ribbon from the box that held a gift from my husband for our third anniversary tied around it, and an iron bird on a branch that also came from the flea market.

Hanging up is one of Murphy's toys, his leash and harness, a towel for wiping off his feet after messy walks, a little ceramic IKEA pot that holds plastic bags for picking up after Murphy on walks, a towel for wiping up the water he splashes all over the place when he drinks, and another IKEA pot for Milkbones.

On the mat under the shelf is the trash can we use to store his food. It took us awhile to come up with this solution, but we're really happy with it! It has a removable plastic insert that helps contain the scent of his food and can be rinsed out. The pedal-controlled lid makes feeding him super easy. His food and water dishes are on the mat too.

Anyway, it wasn't some huge undertaking, but it took a lot of thought beforehand and has made a huge difference in managing Murphy and his stuff. It's in the back corner of our kitchen where the side door is, so it's almost always out of sight, but we use it all day long, so I like that it looks nice and clean.

Let the projects resume!

Sunday, January 13, 2013

A Very BILLY Holiday

This holiday season I installed wood floors on the first floor of my house and converted a wall of IKEA BILLY bookcases into faux built-ins using paint and trim.

A little back story: When my husband and I bought our house in 2011, we knew we would want to replace the carpet on the first floor with wood laminate ASAP. Upon moving in, other projects took priority. Then, in the summer of 2012 our dog was diagnosed with terminal lymphoma. His symptoms did serious damage to carpet we already hated, so the floors moved back to the top of the list after he passed away. We knew we'd need some time off of work to get it done, so I suggested Thanksgiving (a holiday I do not particularly care for). Thanksgiving is my husband's favorite holiday, but he graciously agreed to give it up in order for us to have five days to install new floors. We figured it might take three days, and then we could relax and have a nice big meal on Sunday.

Yeah, that didn't happen. In short, nothing went as planned. Some parts were much easier than anticipated (tearing out the carpet), but most parts were much more difficult (EVERYTHING ELSE). We took the full five days and still had to install the molding the following weekend. It was the greatest test of our relationship to date, and we've been together since 2000. The good news is the floor looked amazing! They made our house look so much fancier. There was, however, one small problem: The new floors were the exact same color of wood as our wall of BILLY bookcases from IKEA. Ugh.

[Aside: When we got married, we used some of our wedding money to purchase a wall of BILLY bookcases for our rental house. I narrowed it down to either the dark wood or white finish and settled on the dark wood because we had light wood floors at the time and I figured if I decided I would prefer white later, I could always paint them. The nearest IKEA was in Charlotte and conveniently, I had plans to fly out of Charlotte to the Thousand Islands with my friend Amy, so I talked her into going to IKEA with me before our flight. It was an adventure that ended in us discovering that the shelves wouldn't fit in my car. We split the load between our two cars and left them in Charlotte during our vacation. When we got back, Amy said she would be in my area the following week and could meet me to deliver the rest of the shelves then. (Did I mention what a good friend she is?) The best part? In the week between my return from Charlotte and Amy's delivery of the bookcases, I bought a station wagon. No joke. End of aside.]

So back to Thanksgiving, now I was stuck with shelves and floors that were the same color. The obvious solution was to paint the shelves, which is exactly what I did. I used a laminate primer (2 coats) and then painted them the same color as our walls. I couldn't believe how well the primer worked! I had done a little research online about painting laminate, and everyone said the key was priming and I can testify to that. My husband helped me attach white molding on the top and bottom of the shelves that matched the pre-existing molding in our house. I used white lattice to trim out the fronts of the shelves and we added boards between the shelves to frame out the wall-mounted TV. Finally, we added rope lighting across the tops of the shelves. We didn't finish until the last few days of December. It was a very BILLY holiday...


Thursday, November 22, 2012

Hidden Treasure

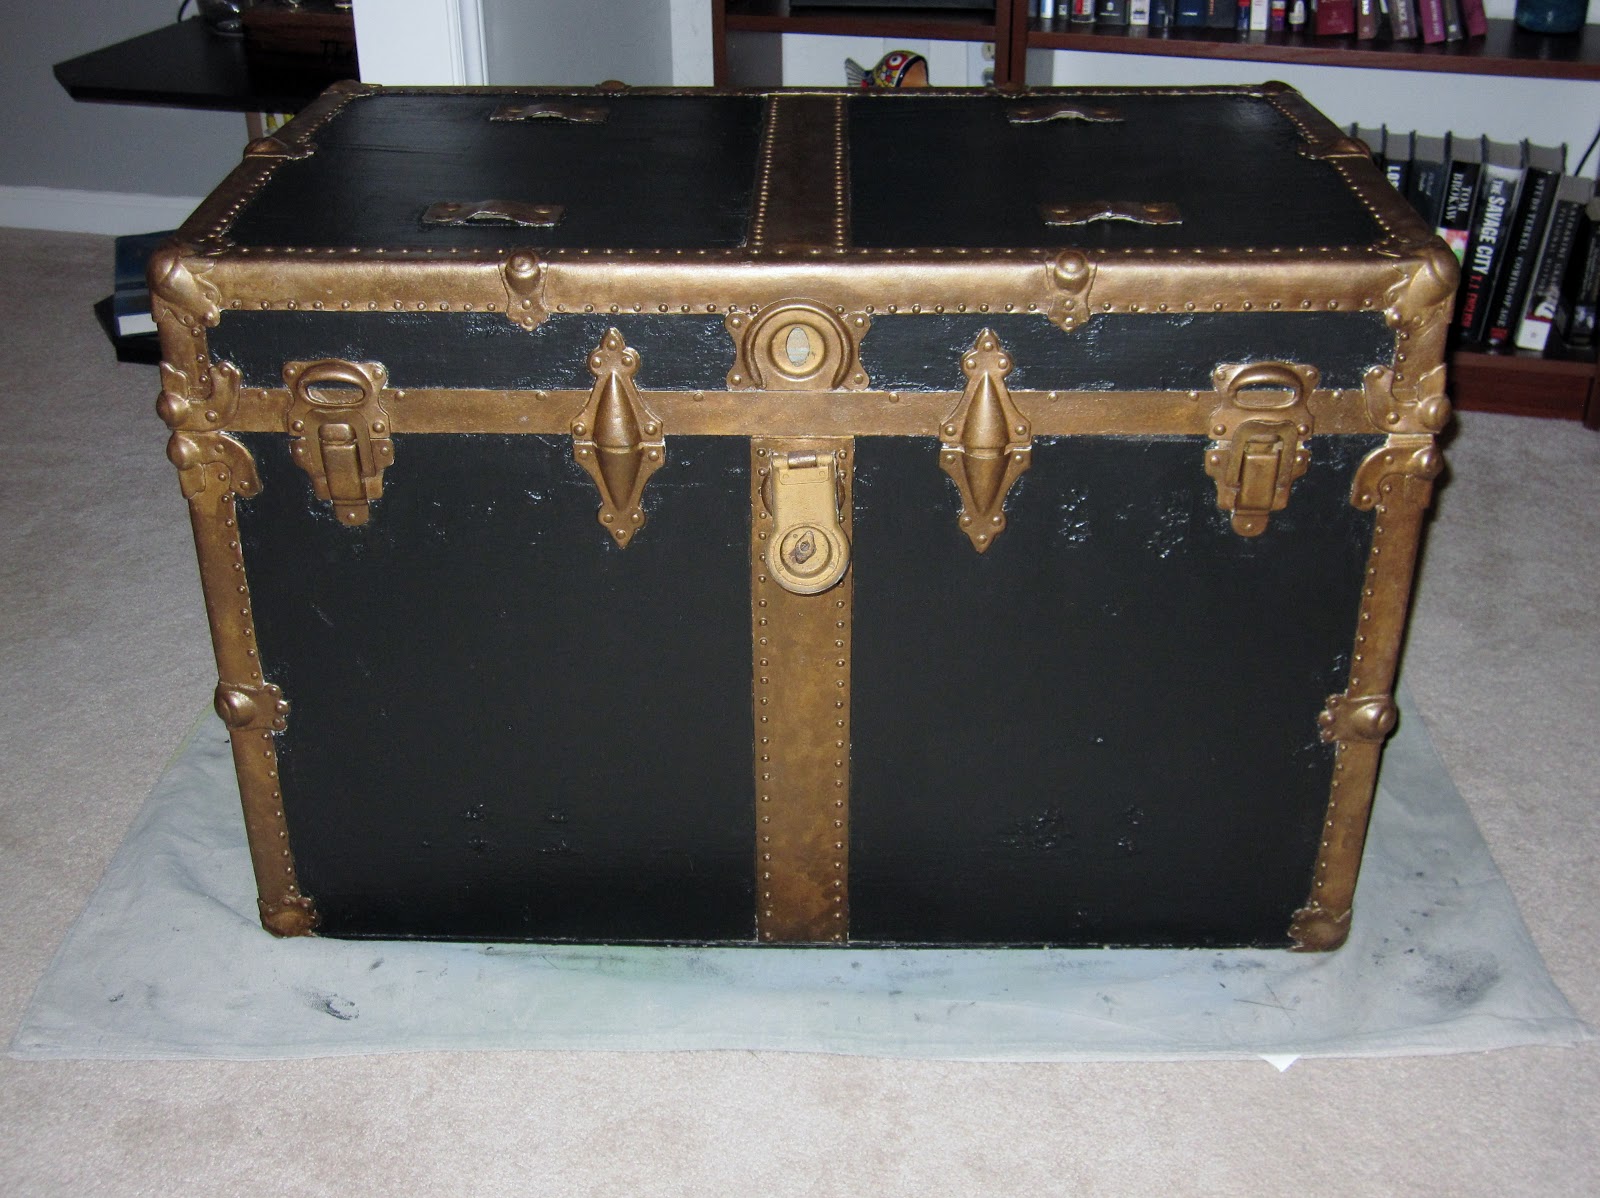
My colleague and first client (CS) inherited this trunk from her Great-Grandmother via a cousin: 


CS told me she might want to use the trunk as a coffee table if it was black and looked a little nicer. Initially, I was skeptical of my ability to improve this trunk very much. The body of the trunk was made of a thin wood that had a lot of warping and cracking, so sanding the paint off was not an option. The metal trim was painted over with white in some areas and covered with a metallic paint everywhere else. I knew it was unlikely that I would be able to restore the original metal and may be faced with having to cover it in yet another coat of paint. I assured CS I would do the best I could to provide the highest quality improvement possible while retaining the vintage nature of the piece.

I started by using a Mr. Clean Magic Eraser to clean the exterior of the trunk, which was pretty grimy. (Aside: I can't say enough about how amazing this product is! I've been using Magic Erasers for years to clean our sinks and bathtubs, but it really hit me how incredible they are when I used one to clean a vintage white leather Dooney & Bourke handbag that I picked up for $5 at a yard sale. Seriously awesome!) Once the trunk was clean, I did try to sand the white paint off of the metal trim, but all I found underneath was rust. I knew that sanding the metalwork was out of the question and so was using any sort of solvent to remove the paint. That left me with just one option -- repaint the metal trim. 

Once the trunk was clean, I had to do a lot of thinking about how to tackle painting it. I considered using a metallic spray paint to cover the trim, then painting the black by hand. I also considered spray-painting the trunk black, then using a metallic paint to refinish the trim by hand. Ultimately, I decided spray paint wasn't gonna cut it, so I painted it all by hand. 

I spent about $15 on Magic Erasers, black paint, a large paintbrush, bronze metallic paint, and tiny trim brushes. I started by using the large brush to paint the white wood surface black, getting as close in to the metal trim as I could. Then I used a dry-brushing technique to apply the metallic paint to the trim. It was tedious work, but I knew it was essential to provide the vintage finish I was aiming for. I followed up with a second coat of black paint, using the tiny trim brushes to get into the nooks and crannies where the wood and metal met. I couldn't believe the difference! 


Seriously, is this the same trunk?! 

My favorite part of this project was when I put the finished trunk in the back of my car to deliver it to CS and I made a stop at the Starbucks drive-through. The girl working the window told me my total and then exclaimed, "Where did you get that treasure chest?!" It turns out her nephew is really into pirates and she'd been looking for a trunk that could pass as a treasure chest for him for Christmas. Maybe I should get some business cards...

Monday, November 12, 2012

Time and Relative Dimension in Space

I've been doing fewer and fewer major projects as my real job has taken up more and more of my time, but I'm still managing to stay in the game with smaller, personal projects. This includes my latest Halloween costume! Halloween is my favorite holiday, surpassing my birthday since I've reached my late-20s. This year my husband and I decided on a "couple's costume" back in August: Dr Who and the TARDIS.

I didn't want to be a big blue box and I love creating costumes based on imaginative interpretations, so I started by sketching out some design ideas, then scouring the Web and shopping centers for inspiration. I eventually settled on the following:

- Sparkly blue headband to represent the light on top of the TARDIS (Target $4)
- Plaid scarf to represent the windows (SakkasStore.com $20)
- Blue dress (Express $35)
- Yellow shoes (my wedding shoes, spray-painted yellow)
- Tote bag inspired by the signs on the outside of the TARDIS (made with black and white fabric scraps, a Sharpie, white paint, and tea)

I usually try to avoid spending much money on costumes, but I knew the dress and scarf could be incorporated into my regular wardrobe, so I didn't worry much about price. Plus, I had a blast doing it and it was a nice distraction from the demands of my job. So was the party we threw!


[Quick note on the dress: It was way too big, but unavailable in the next size down. After wearing it for the party, I started to doubt whether I would wear it again because it was literally falling off of me, as evident in the photograph. Then I had the brilliant, though delayed, idea to shrink it in the dryer. Now it fits perfectly!]


Sunday, September 23, 2012

IKEA Overhaul

Back at the end of June, my friend Carolyn asked if I could help her find a dining set for her apartment. Her place has a very open floor plan, so finding the right set presented some challenges. We decided to try the IKEA in Charlotte since we would be flying out of there for our annual Thousand Islands vacation. After spending some quality time in our favorite IKEA model room (the library), we found this table and four of  these chairs.

[Carolyn and I in our favorite IKEA room]

Carolyn had some really good ideas for how to customize the table and chairs for her apartment. She wanted the chairs to be a mild green, the base of the table to be cream, and the tabletop to be stained a dark brown.

For a variety of reasons, it took me three months to finish the whole project. (Tip: Don't plan spray painting projects for the summer if you don't have an indoor work space. Extreme heat + summer storms = not conducive to outdoor spray painting.) But Carolyn was very patient and here is what she ended up with:


See the gorgeous sheen on the tabletop? That is the result of my first foray into using polyurethane on top of stain. I was really scared I was going to screw it up, but in the end it turned out great! I love the look and it's such a great fit for Carolyn's apartment. For more of Carolyn's style, check out her blog.

Thursday, August 16, 2012

For Me

The weather has been wreaking havoc on my attempts to paint, sand, or stain any furniture. It's too hot, too humid, too rainy, or too all three. I've been stuck working in fits and starts or on indoor projects. Sewing is about the only indoor craft I do, so I did this:


What had happened was... my friend SH was having a bridal shower in which the guests were encouraged to  wear vintage clothes. I did not realize there was a vintage theme until a few days before. I never miss the opportunity to play dress-up, so while scoping out furniture at Cause for Paws I decided to look over the dress selection. That's where I discovered this little gem / monstrosity. What drew me to it was the print:


Now, I wouldn't be caught dead wearing this dress the way I found it (bringing myself to wear it long enough to have my husband snap a BEFORE pic was a stretch and putting it out there for all to see on the Interwebs is giving me palpitations), so I knew I was going to alter it. Unfortunately, while the transformation was in progress I got sick. I ended up having to miss the bridal shower and the dress got pushed to the back burner. When I realized I was stuck with indoor projects, I decided to finish it.

I had started by removing the neck and sleeves. Instant improvement! I put it on and pinched the front to create a sweetheart neckline. I stuck a safety pin in the pinch and did a little folding to tuck in the unfinished edges (100% polyester = easy to work with). Then I used the tie from the waist to make a halter strap, again using safety pins to hold things in place. From there it was just a matter of sewing everything down. I also removde the zipper from the back and took it in just a smidge. Of course I took the hem up, primarily because I loathe maxi dresses. I found a coral belt at Target and BAM, cute "new-vintage" dress -- just for me!

Tuesday, July 17, 2012

Busy busy busy

Lately I've been busy working on projects, which is great, but it's put me a little behind on this blog. So here's an update: 

First, my friend and co-worker, AS, had this chair that she, her son, and her cats, all loved. It was basically a large cushion that was suspended from four legs. Due to the extensive love that had been lavished upon the chair, the front of the cushion had gotten a little worn. She wanted to know if I could replace it for her. Now, it has to be said that while I am passable at upholstery, it's not my favorite thing to do. But it seemed simple enough and she's a good friend, so I took it on. I made a trip to JoAnn Fabric and texted AS pictures of  fabric options. I nailed it in two! We chose an outdoor fabric for easy cleaning and longer durability (plus, it was the perfect print). That was the high point. Problems quickly arose:

1. I am allergic to cats. Every time I worked on the project, I had sneezing fits.
2. The fabric on the back of the cushion was 100% acetate (read "super thick and tough"). 
-- a) My sewing machine hated it
-- b) Hand-sewing made my fingertips red and raw
3. It was 100+ degrees outside and my sewing room is upstairs, so I felt like I was working in a sweat-shop.

Suffice it to say, I finished the job vowing to myself that I would really have to consider taking on upholstery gigs in the future. Especially from houses with cats. 

Ultimately, the finished product turned out great and looks awesome in AS's house. Plus, she got to keep a piece of furniture that she loved instead of having to find something new. Totally worth it.


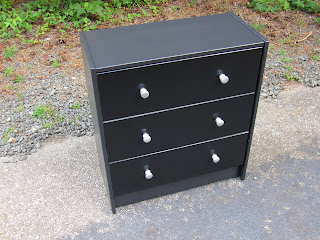
My next project was for another co-worker, DM. He was moving into a new apartment and needed a small dresser. I had a ton of time to do this project since he didn't want the dresser until he moved. I looked and looked and looked at my favorite thrift stores, but couldn't find a dresser small enough or in good enough condition to refurbish. I finally caved and suggested an unfinished wood dresser from IKEA as a starting point. I wouldn't usually buy something new, but I couldn't figure out another way to meet the needs of my client. I picked up the dresser, then went on vacation!

DM really wanted a simple black dresser, which should have been the easiest job ever. But the wood soaked up all the spray primer, then soaked up all the black spray paint. I added layer upon layer of paint, but the finish just got funkier and funkier. For some reason, it worked fine on the drawer fronts, but not the dresser itself. I decided to sand the dresser and roll on a less glossy paint. It gave the dresser a cool look, because even though it's all black, it's two different finishes so it has some dimension. Finally, to save DM money, I painted the original hardware with a metallic paint instead of buying new hardware.


As you can see, I painted the inside of the drawers grey, just for another bit of interest. DM was happy, so I was happy! What makes me even more happy is having several other projects lined up for when I get back from my next vacation. Busy busy busy.